A raised row garden (using beds) is one of the easiest, most inexpensive, and most efficient types of small-scale garden one can set up for seed production. It generally requires less maintenance as it is designed to optimize work in the garden. Coupled with a no-till approach, it is a great solution that will not only further improve and preserve the soil’s structure over time but will also help in the sequestration of carbon.
Layout
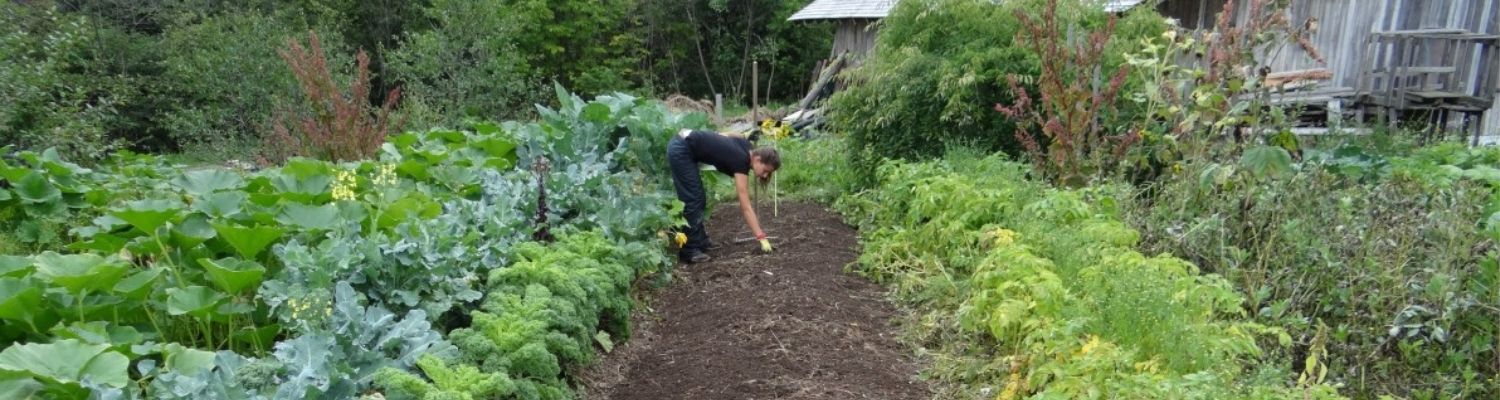
Depending on your climate, the garden should ideally be set up in a location with eastern sun and western shade that is fairly protected from the wind. To this end, it is important to observe and study beforehand the prevailing winds’ patterns, the seasonal sun paths, and draw up a shadow map of your garden. The rows can then be built right on top of the ground, provided the existing area is suitable to do so (mostly covered with grass) or after clearing it out if necessary. In some cases, an initial tillage might be needed to break up the sod. Besides the creation of the bed for each row, this will be the only time (and the last) you will ever need to, as tilling harms the soil in the long run, involves more work, and encourages the emergence of weeds.
The number of rows and their size must be sufficient to grow enough plants in order to maintain a good, diverse population size for each crop–a critical parameter when it comes to seed production (see Population Size from Module IV for more information). The within-row and between-row spacing parameters will inherently depend on the space available in your garden and will have to be adjusted accordingly based on the crop types selected for seed production (discussed in Module VII for each crop when applicable). The raised beds can be made using the following dimensions as general recommendations, which will suit most cases: 60-90 cm in width, 10-15 m in length, 20-30 cm in height, with 70 cm-1 m left between each row for access (humans and tools such as wheelbarrows). The beds are built through the excavation of the access paths, where the soil is put on each of their side, which will then create the rows. An extra layer of topsoil can be added if necessary to reach the desired height. The edges of each row is then tapered down or planted with a perennial ground cover crop to ensure a good stability and prevent erosion. The soil itself can be amended with a layer of biochar, surface compost, then covered with mulch (see Building and Nourishing the Soil Organically for more information). Feeding the soil adequately is important as plants intended for seed saving will stay longer in the field compared to crops grown for food consumption, typically until the end of their lifecycle. The access paths will also benefit from being mulched, which will prevent the growth of weeds and facilitate work around the garden. Wood chips, straw, leaves, or cardboard are all suitable and inexpensive options. A perennial cover crop such as clover can also be planted, which will act as a living mulch.
Depending on the scale of your garden, irrigation systems such as drip-based solutions are generally preferred as they are easy to install and more efficient. Those can be turned on and off based on a schedule or put on an automation system to save time. If your garden is relatively small, a hose or a few watering cans might be more appropriate (making sure to water at the plants’ base). Note that water for non fruit-producing plants should be reduced when the flowering period of the crops is near its end, which will allow the seeds to ripen faster. Regarless of the irrigation method used, the water should be allowed to drain easily and beds designed with that aspect in mind. Extra rows, separated from the main ones, can also be built and dedicated to conducting trials with, for instance, crops growing under challenging conditions (no fertilizer, limited watering, different sun exposures, etc.) with the aim of creating resistant varieties specific to your area (see Conducting Trials).
To keep out animals, the garden can be fenced with legume trees (gliricidia, leucaena, acacia) that will then provide biomass material for enriching the soil or making biochar, or with a dense layer of vetiver grass. Those should ideally be planted before building the raised rows as they require a certain amount of time to grow. Other materials readily available can be also used (bamboo, pallets, chicken wire).
Planting and planning
Seeds that are meant to be planted for seed production must be carefully selected beforehand and free of any bacterial diseases, as plant pathogens are often introduced into a crop through infested seeds. Bacterial pathogens are particularly notorious for this method of spread, and the earlier a pathogen comes in contact with the crop, the greater the potential for a serious disease problem to develop. For this reason, it is critical to start with “clean”, well selected and well maintained stockseed. Several methods can be used to kill bacterial pathogens on or within the seeds, including a hot water treatment (detailed through the Storing section of this website).
Since seeds used in organic production systems are not treated with a synthetic fungicide to control fungal pathogens that cause damping-off, good cultural, biological and sanitation procedures are important in order to prevent the introduction of these fungi. Such practices include:
- Keeping the greenhouse, tools and trays clean and not allowing seedlings, planting mix, or plants to come in contact with outside soil;
- Only using well or city water to water seedlings and plants;
- Using a pathogen-free planting mix. Mixes containing a high quality compost can be suppressive to Pythium and some other damping-off organisms;
- Maintaining greenhouse environmental conditions that are optimal for seed germination but not for pathogen development. Do not overwater seedlings, allow soil temperatures to become too cool, nor overheat the greenhouse;
- If available, select disease-resistant varieties.
Additionally, the stockseed should be inspected for any off-types (color, shape, size, weight) or unidentified seeds and removed accordingly. Seeds that are smaller and lighter than the standard often indicate their immaturity and will not germinate well. Be careful not to eliminate variability in seed type that occurs naturally. Make sure to remove any weed seeds that are present. Recording and tracking are particularly essential in the management of your stockseed: name, source and year, sowing date and location, harvest and storing dates should be recorded for each variety.
Upon planting, plants that are specifically intended for seed saving should be clearly labeled, which will also allow help to distinguish varieties from each other. It is good practice to never plant two varieties of a same species in the same location for two consecutive years. This would indeed promote the emergence of certain diseases (that can be contained by using crop rotation techniques) and make any seed saving work much harder in the event volunteers from the previous variety are not noticed soon enough, allowed to mature and go to seed. Never plant all the stockseed from a given variety at once, especially if it’s a rare one. Always ensure to keep a reserve in case a disease breaks out or unexpected/detrimental weather events happen. Never conduct experiments with seeds you cannot afford to lose. Broadcast sowing should never be used for seed production fields as this makes roguing and inspection very difficult. In order to preserve the genetic diversity of a variety, it is important to sow enough seeds to obtain a plant population that will sustain it adequately (see Population Size from Module IV for more information). Note that if you are looking to plant a variety you are not familiar with, it is often recommended to first grow it for one growing season without harvesting its seeds. This will give you a better idea of what the “standard” characteristics of the variety look like and will help you to ensure that the variety that was given or passed down to you is really the one it claims to be. Isolate the crop if the situation requires it (see Module IV for more information about isolation techniques).
Commercial varieties are often engineered to perform well under a wide range of climates and growing conditions, with their seeds having a very broad regional adaptability. Moreover, there is often a lack of information regarding the conditions in which those seeds were processed, stored, or transported, hence the importance of producing seeds on-site or buying them from a trusted, organic source located in the same area. Focusing on local varieties and seeds will also allow you to grow plants that are agroecologically suitable to the climate of your locale and soil and ultimately to your growing methods. Doing so will concurrently contribute to building and securing food sovereignty locally.
Based on your crops’ type and growing requirements as well as climate, the seeds will have to be started in a greenhouse/nursery or can be planted directly when the conditions allow it. In temperate regions, cover crops can be grown in late summer or fall to specifically further feed the soil through nitrogen fixation and the release of other nutrients as they are breaking down the following spring. Planting can be done following a moon calendar, where crops are planted during specific moon phases. Thanks to the moon’s gravitational pull and moonlight, the lunar cycle would have a beneficial influence on plant germination, growth, and moisture levels in the soil, but would also affect the rise and fall of sap in plants. Annuals that produce above ground are planted during the light, or waxing of the moon (from the day the moon is new to the day it is full); biennials that produce below ground are planted during the dark, or waning of the moon (from the day after it is full to the day before it is new again).
When planting for seed production, spacing is an important parameter to take into consideration. Crops will indeed grow taller and wider as they reach full maturity than the ones grow for regular consumption and will therefore need to be spaced further apart. The thinning process will then need to be carried out accordingly. Adequate space should also be left to accommodate the possible staking, trellising, and isolation structures necessary in the future. Plants that will grow much bigger than they normally would as vegetable crops may indeed need staking (such as cabbages, carrots, and onions) or trellising (beans, peas). This will keep them from lodging (falling over) and help promote airflow, which will then reduce the emergence of diseases and aid in the drying process of the mature seed crop. Doing so will also facilitate your work in the garden while staying organized. Trellises can help in further optimizing space and therefore increase your seed production. For instance, a square structure could be built around the trunk of papayas, with chayote climbing on top, beans growing around, and a shade-loving crop placed under. Stakes and trellises can be made out of several kinds of material such as bamboo, garden netting or rebar and in different shapes (teepees, A-frames, arches, tunnels).
Recording is an essential tool that will, through the gathering of key information and observations for each phase of the seed production process (growing, harvesting, processing, storing), help you to continually optimize your operation as well as the quality of your seeds. Documenting the evolution of each variety grown in your garden through the use of notes and other material is indeed a great way to understand and track their development through the seasons. Important information worth keeping records of include – but are not limited to – the name, source, planting/harvesting/processing/storing date, germination rate, spacing of plants, soil amendments added, watering schedule, isolation distance, number of plants (population size), pollination method, phenotypic details about the crop, soil conditions, pests, diseases, pollinator population, as well as important weather events (frost dates, high temperatures, rainfalls) experienced by the crop. A map of your garden can be designed to track the location of each crop, which will help you better plan your crop rotation strategy from year to year.
Isolation techniques and requirements for each crop are discussed in Module IV and in Module VII.